

Introduction
Do you want to create an engaging personal blog with a modern design and a smooth user experience? If yes, then you're in the right place! This tutorial will guide you through the necessary steps to create a beautiful and dynamic blog using two powerful tools: Sanity v3 and Next.js 13 with App Router.
The combination of Sanity and Next.js has become a popular choice for modern web developers looking to deliver dynamic and flexible content to their users. Sanity, as a content management system (CMS) focused on APIs, allows you to easily manage content, while Next.js provides a robust React framework for building fast and responsive user interfaces.
In this article, we will cover the basic steps to create a blog, starting from setting up the project to integrating Sanity as the CMS, and finally implementing routing using the new App Router in Next.js 13. You will learn how to create and manage blog posts, design an attractive layout, and create a comfortable browsing experience for your visitors.
So, are you ready to start your journey in creating a sophisticated and engaging blog? Let's begin with the first step: setting up our project!
Step 1: Creating a Next.js Project
The first step in our journey to create a blog with Sanity v3 and Next.js 13 is to create an empty Next.js project. To do this, follow the steps below:
- Open Terminal: Open the terminal or console on your computer. You will use the terminal to run the necessary commands.
- Create a Next.js Project: In the terminal, type the command
npx create-next-app@latestand press Enter. Here's a guide for the configuration options when you run thenpx create-next-app@latestcommand and select the following options:
√ What is your project named? ... blogs-page
√ Would you like to use TypeScript? ... Yes
√ Would you like to use ESLint? ... Yes
√ Would you like to use Tailwind CSS? ... Yes
√ Would you like to use src/ directory? ... No
√ Would you like to use App Router? (recommended) ... Yes
√ Would you like to customize the default import alias? ... No- After the process is complete, the next step is to navigate to the newly created project directory using the following command:
cd blogs-page. - The next step is to open the project folder. If you're using Visual Studio Code, you can open the text editor by typing the command
code .in the project directory you created earlier. You can also open your preferred text editor and navigate to the project folder you created earlier. - The final step in setting up the Next.js project is to ensure that all configurations are running smoothly and have been installed correctly. You can do this by running the command
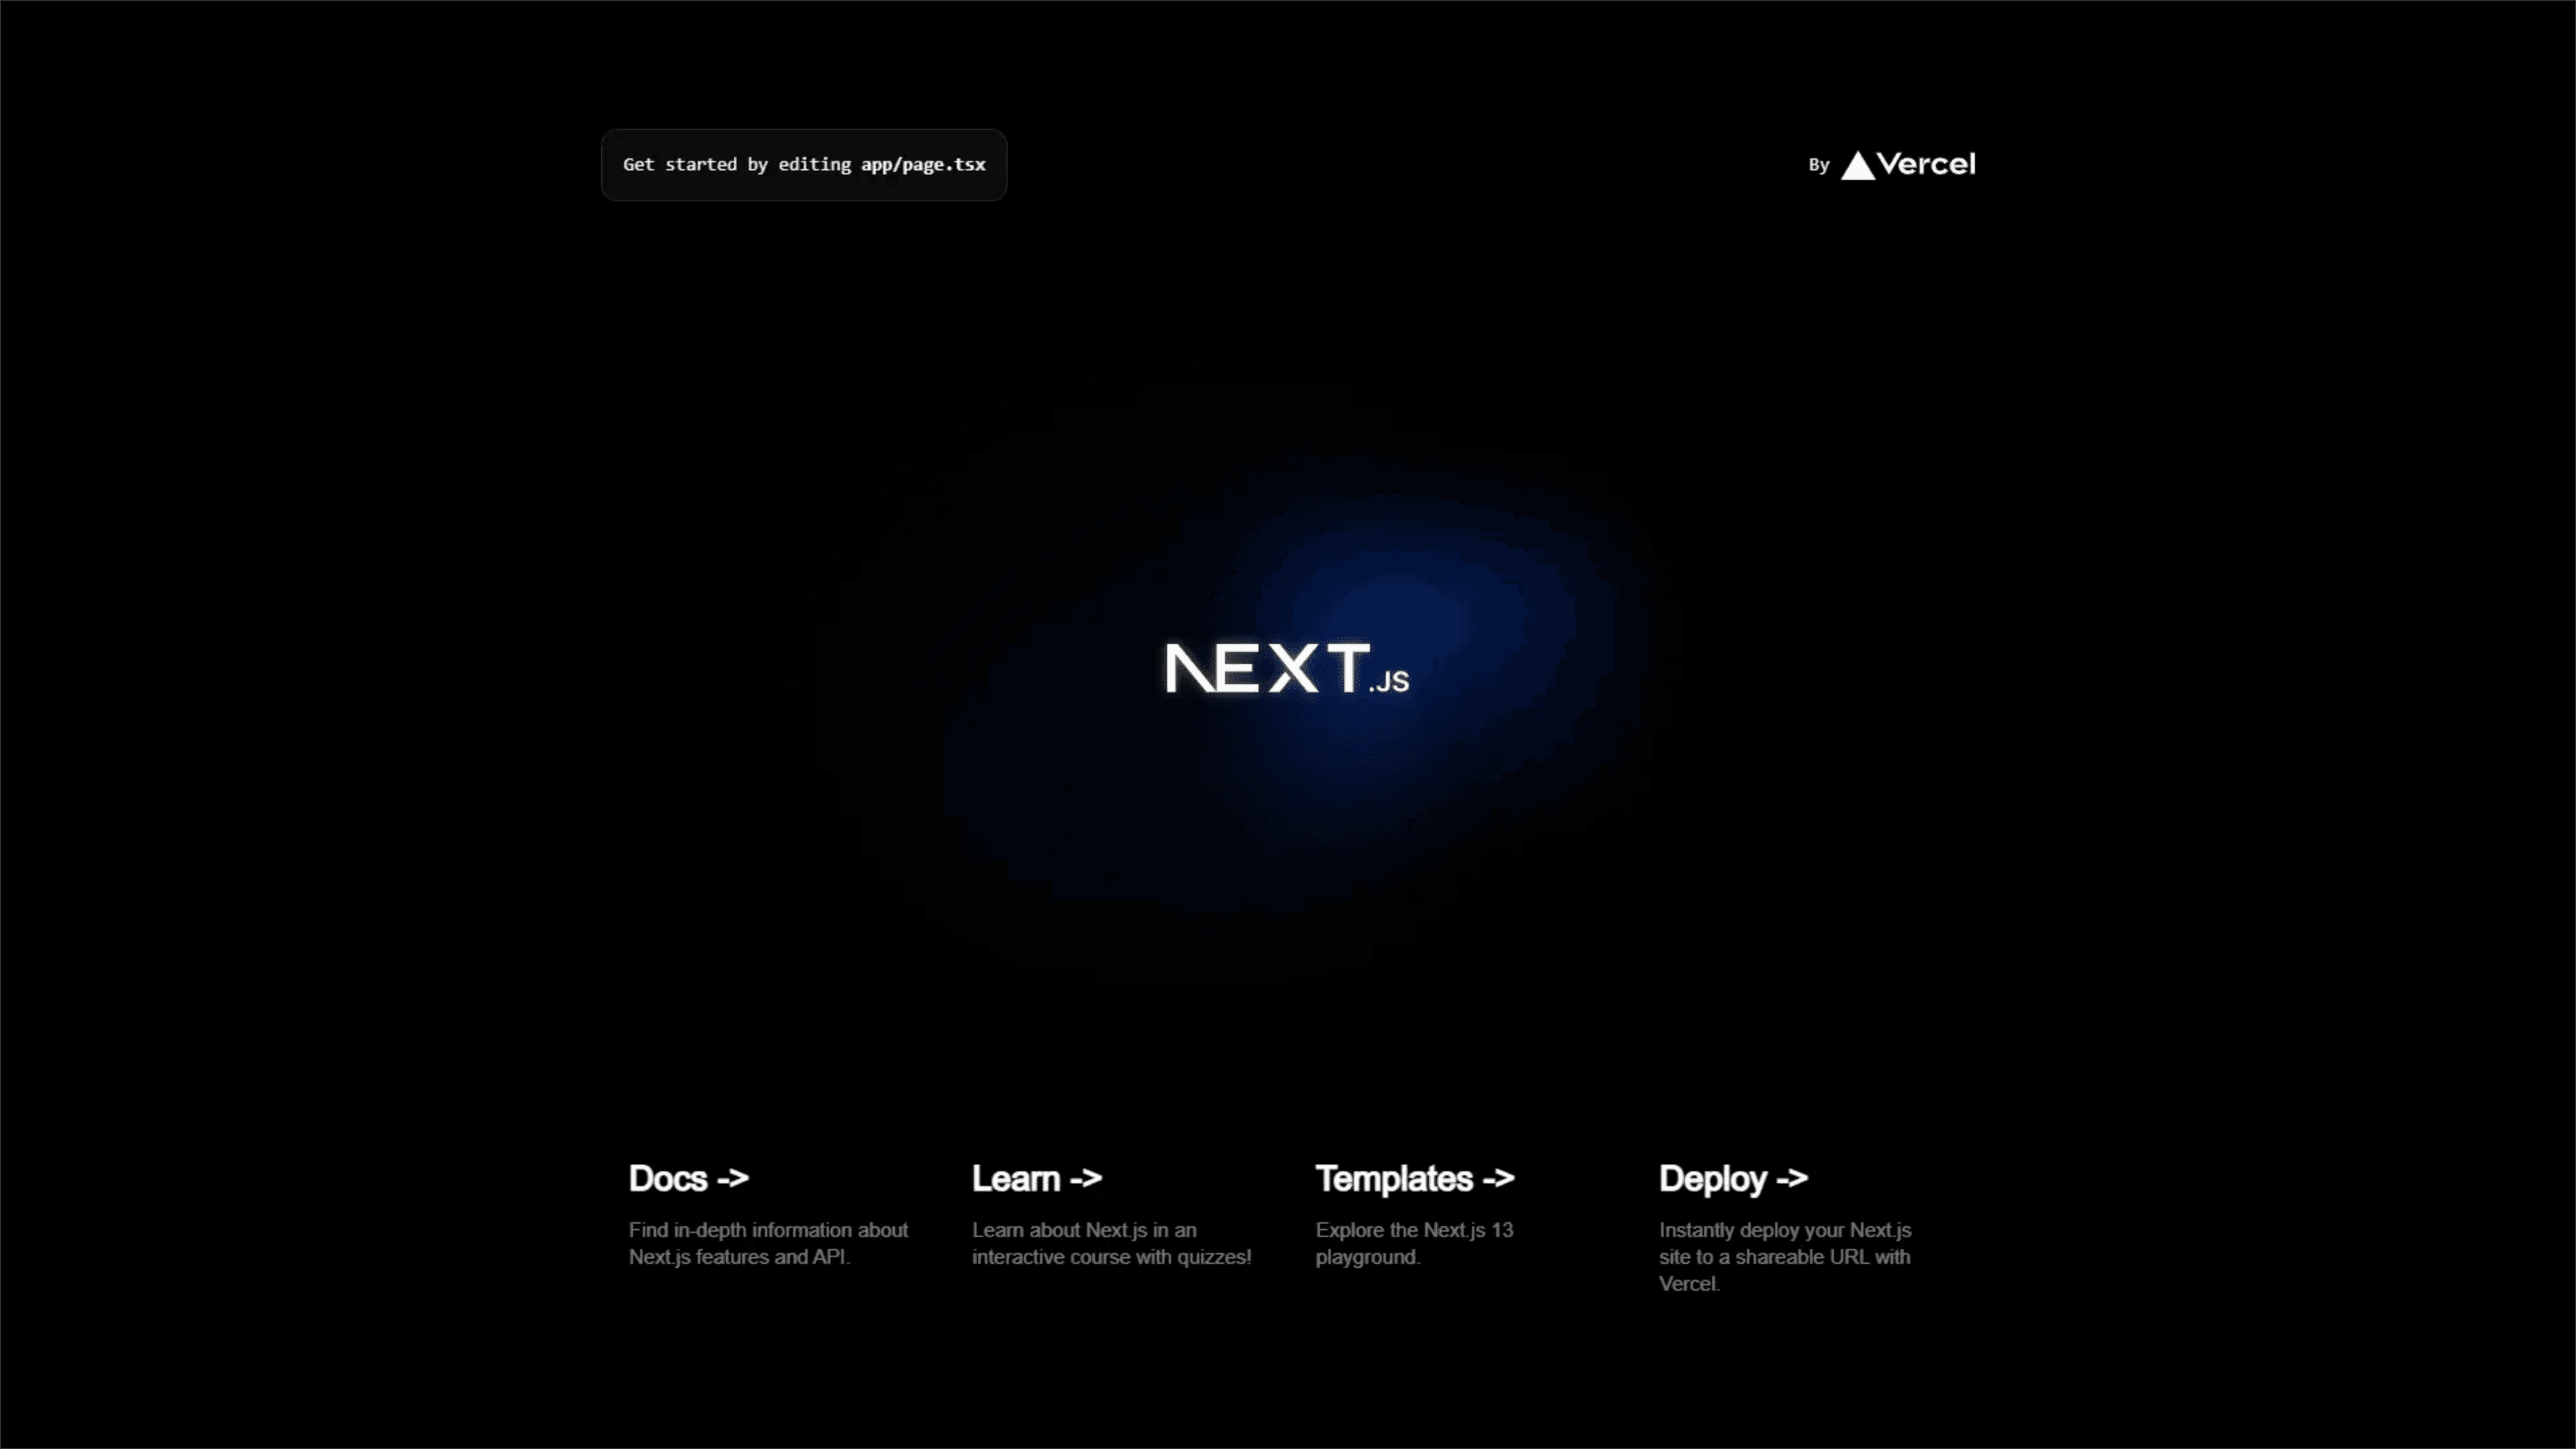
npm run devin the terminal. If all configurations are successful, you will see the following display:
Step 2: Install Sanity
- First, install Sanity using the command
npm install --global sanity@latest. - Next, you need to log in to your Sanity account. This will allow you to manage your project with Sanity. Use the following command:
sanity login. - Once you are logged in, you can create a new Sanity project. To do this, use the following command:
npm create sanity@latest. After that, you will be prompted to provide some project information. Follow the configuration below:
Select project to use Create new project
? Your project name: blogs-resource
Your content will be stored in a dataset that can be public or private, depending on
whether you want to query your content with or without authentication.
The default dataset configuration has a public dataset named "production".
? Use the default dataset configuration? Yes
✔ Creating dataset
? Would you like to add configuration files for a Sanity project in this Next.js folder? Yes
? Do you want to use TypeScript? Yes
? Would you like an embedded Sanity Studio? Yes
? Would you like to use the Next.js app directory for routes? Yes
? What route do you want to use for the Studio? /studio
? Select project template to use Clean project with no predefined schemas
? Would you like to add the project ID and dataset to your .env file? Yes
After completing these steps, the Sanity project will be set up and ready to be used for managing blog content. We can proceed to configure the blog schema and start developing our project.
Step 3: Configure Blog Schema
Folder Restructuring
Before we proceed further, let's restructure the folders in our project. Open the app folder and create a new folder named (root). Inside the (root) folder, add a file called layout.tsx, and create a folder named (home). Move the page.tsx file from the app folder to the (home) folder. With these steps, the folder structure of our project will now look like this:
~/blogs-page
//app directory
├── app
|	├── (root)
|	|	├── (home)
|	|	|	├── page.tsx
|	|	├── layout.tsx
|	├── studio
|	|	├── [[...index]]
|	|	|		├── page.tsx
│   ├── favicon.ico
│   ├── globals.css
│   ├── layout.tsx

//sanity directory
├── sanity
|	├── lib
|	|	├── client.ts
|	|	├── images.ts
|	├── env.ts
|	├── schema.ts
Configure the Schema
Next, let's create a schema for our blog content. To do this, open the sanity folder, create a new folder named schemas, and move the default schema.ts file into the schemas folder. Then, rename the schema.ts file to resource.schema.ts.
First, we need to define what content will be present in each blog post. In this tutorial, we will create a common schema for a blog. This schema will include the following elements: blog title, reading time, number of views, publish date, author, brief blog summary, tags, blog content, and slug. Later, the slug will be used for dynamic routing to our blog detail page.
The next step is to define those schemas in the resource.schema.ts file. Delete all default imports and code in the file. We will define these schemas using regular objects. You can find the code on my GitHub Gist here.
Next, export resource.schema.ts into a new file that we will name index.ts. The purpose is to easily export new schemas into an array in the index.ts file if we want to add new schemas in the future:
//sanity/schemas/index.ts

import resource from "./resource.schema";

const schemas = [resource];

export default schemas;
The last step in configuring our schema is to ensure that our schema is readable by Sanity Studio. To do this, we need to import the schema into the sanity.config.ts file. Open the sanity.config.ts file and on line 11, change import { schema } from './sanity/schema' to import schemas from './sanity/schemas' and on line 18 change schema to schema: { types: schemas }.
You can see the full code of the sanity.config.ts here.
Alright, if you have followed all the steps above, the final result of our sanity directory will look like this. Make sure nothing is wrong or missed:
//sanity directory
├── sanity
|	├── lib
|	|	├── client.ts
|	|	├── images.ts
|	├── schemas
|	|	├── index.ts
|	|	├── resource.schema.ts
|	├── env.ts
Step 4: Creating Content in Sanity Studio
- The first step is to visit localhost:3000/studio. To access our content, we need to add localhost:3000 as a CORS (Cross-Origin Resource Sharing) origin. So, simply press the Continue button. Then, you will be prompted to log in. After successfully logging in, press the Add CORS Origin button.
- Now, you will be asked to choose a login provider. Make sure the login method you use matches what you used during the initial Sanity installation.
- After that process is complete, we can view our Sanity Studio interface.
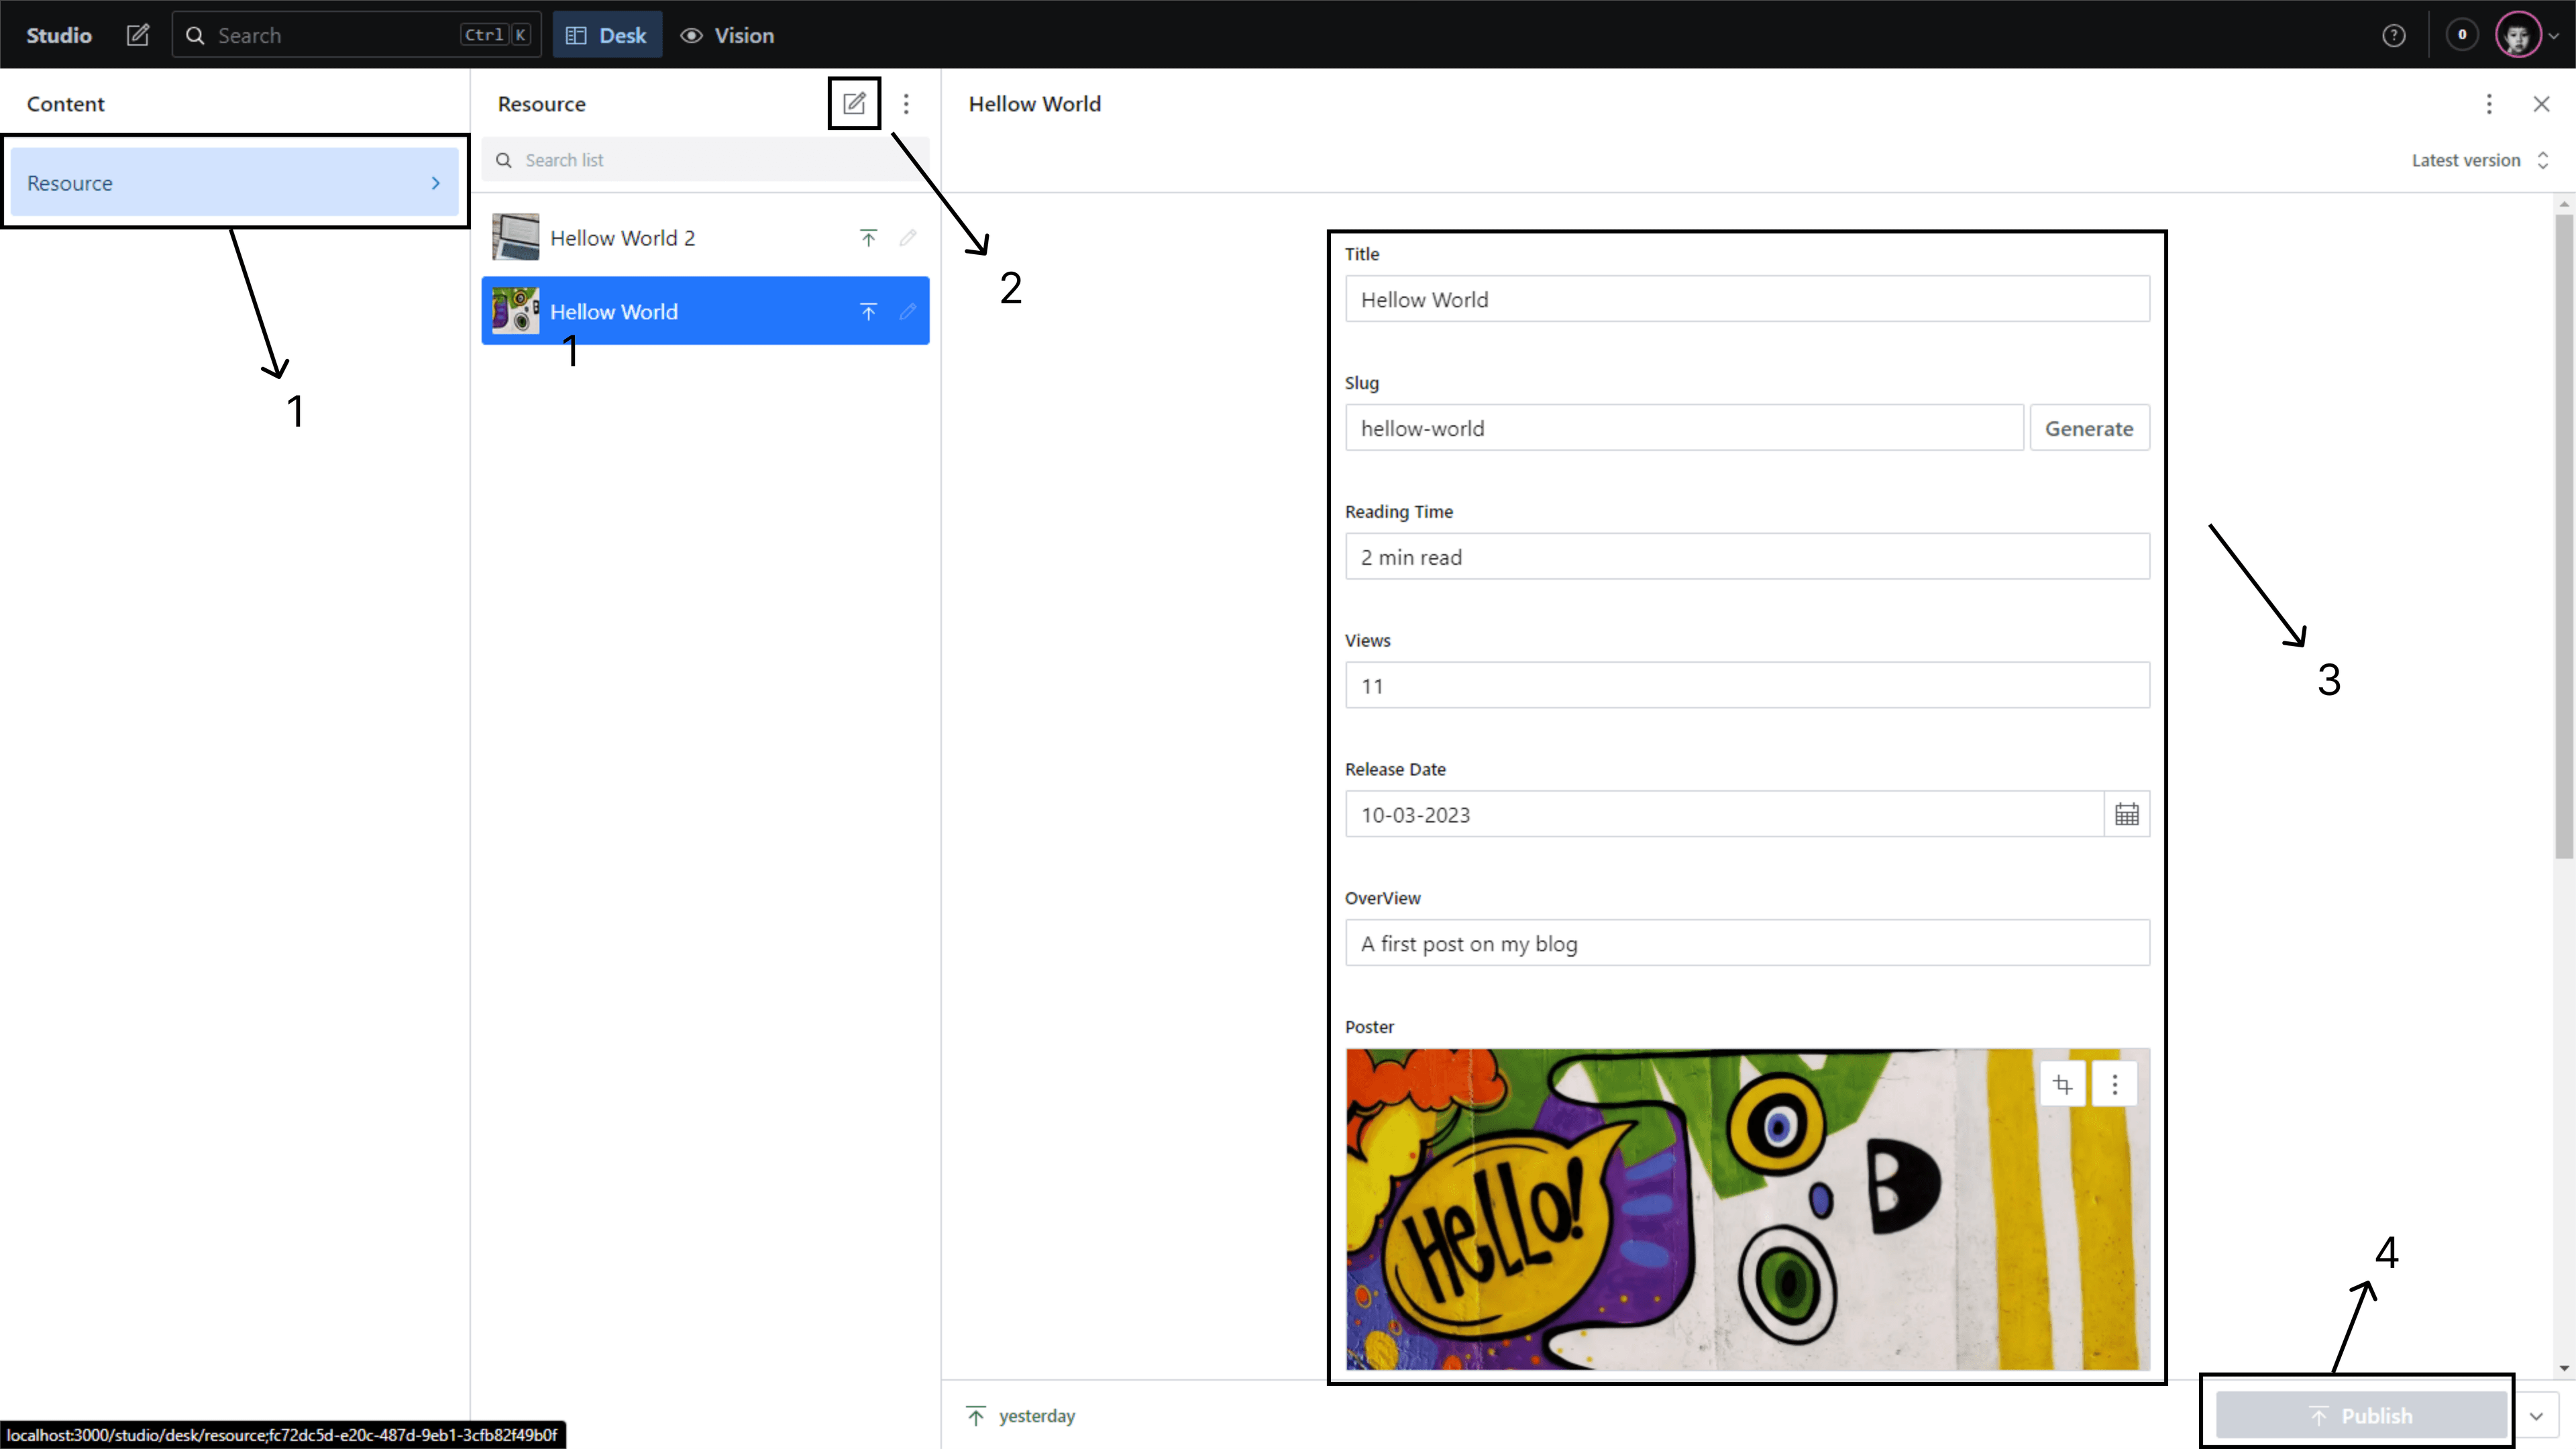
- The first step to creating content is to select the document you want to create. In this tutorial, there is only one document, which is Resource (1). To create new content, simply click the New Document button (2), fill in the blog content as desired (3), and the final step is to click the Publish button (4).
Below, there is an image provided to clarify the steps:
Step 5: Fetching It
The first step is to create some server actions to fetch the blog content from the server side. To do this, we will create a new file in the Sanity directory named action.ts.
GROQ- GraphQL Alternative
But before we continue, let's first get acquainted with GROQ. GROQ is an open-source query language from Sanity and serves as an alternative to GraphQL. With GROQ, we can describe only the specific information we need from our content, similar to GraphQL.
Here is an example of how GROQ is used: *[_type == 'resource' && tags == 'other']{ _id, title, slug, readingTime }
A query that starts with * signifies a similarity to most other query languages, where it retrieves everything with the _type == resource and having other tags, then returns only the information what we need.
Server Actions
After briefly getting to know the query language we'll be using, let's continue. Create a file named action.ts in the root directory of our sanity folder. Then, simply paste the code below into the action.ts file. I will explain it in more detail below:
//action.ts
import { groq } from "next-sanity";
import { readClient, writeClient } from "./lib/client";
import { buildQuery } from "./utils";

interface GetResourcesParams {
  query: string;
  tags: string;
  page: string; //pagination
}

export const getResources = async (params: GetResourcesParams) => {
  // destructure the params
  const { query, tags, page } = params;

  try {
    const resources = await readClient.fetch(
      groq`${buildQuery({
        type: "blog",
        query,
        tags,
        page: parseInt(page),
      })}{
        _id,
        title,
        slug,
        readingTime,
        views,
        releaseDate,
        description,
        "image": poster.asset->url,
        tags,
        content,
      }`
    );

    return resources;
  } catch (error) {
    console.error(error);
  }
};
There are a few modules that are not yet complete, namely readClient and buildQuery. However, that's not a problem because we will complete them one by one. In the try-catch block, the first step we will take is to create a query to sanity/client.ts.
So, open sanity/lib/client.ts, and we will set up the authorization. There are two types of permissions we will use: readClient will be used for GET methods, and writeClient will be used for PATCH methods. Later, we will use writeClient to update the view count whenever a visitor clicks on our blog:
//sanity/lib/client.ts
import { createClient } from "next-sanity";

import { apiVersion, dataset, projectId, useCdn } from "../env";

export const readClient = createClient({
  apiVersion,
  dataset,
  projectId,
  useCdn,
});

// export const writeClient = createClient({
//   apiVersion,
//   dataset,
//   projectId,
//   useCdn,
//   token,
// });
At this stage, we won't be using writeClient yet; we are only introducing the difference between readClient and writeClient. The distinction lies in the token used for authorization, where writeClient requires a token to allow access because we don't want just anyone to be able to modify the content of our blog.
Returning to action.ts, we have successfully created two clients based on their permissions. In the getResource function, we will use readClient. Next, this is where we will begin using GROQ. We will create a function that will assist us in crafting queries. Create a new file in the sanity directory and name it utils.ts:
//sanity/utils.ts
interface BuildQueryParams {
  type: string;
  query: string;
  tags: string;
  page: number;
  perPage?: number;
}

export const buildQuery = (params: BuildQueryParams) => {
  const { type, query, tags, page = 1, perPage = 20 } = params;

  const conditions = [`*[_type=="${type}"`];

  if (query) conditions.push(`title match "*${query}*"`);

  if (tags && tags !== "all") {
    conditions.push(`tags == "${tags}"`);
  }

  //pagination
  const offset = (page - 1) * perPage;
  const limit = perPage;

  return conditions.length > 1
    ? `${conditions[0]} && (${conditions
        .slice(1)
        .join(" && ")})][${offset}...${limit}]`
    : `${conditions[0]}][${offset}...${limit}]`;
};
In the utils.ts file, we create a function named buildQuery that will accept several properties:
type: Indicates the type of resource from which we will retrieve data.query: Used for filtering and sorting.tags: Used to fetch data based on specific tags.pageandperPage: Used for pagination, which we will discuss later. We have successfully created the buildQuery function.
Let's go back to action.ts:
//sanity/action.ts
try {
  const resources = await readClient.fetch(
    groq`${buildQuery({
      type: "resource",
      query,
      tags,
      page: parseInt(page),
    })}{
      _id,
      title,
      slug,
      readingTime,
      views,
      releaseDate,
      overview,
      "image": poster.asset->url,
      tags,
      content,
    }`
  );

  return resources;
} catch (error) {
  console.error(error);
}
In action.ts, we can call buildQuery and pass the parameters we defined earlier in buildQuery:
- We have defined the
typeasresource. - Next, we can pass the query and
tagsparameters because we will fetch all the blog data. - The final step is to determine what we want to return. At this stage, we return all the information because we will use all this information on our blog page.
Up to this point, we have successfully created a server action to fetch data for our blog cards. Ensure that the final folder structure for your sanity directory looks like this:
//sanity directory
├── sanity
|	├── lib
|	|	├── client.ts
|	|	├── images.ts
|	├── schemas
|	|	├── index.ts
|	|	├── resource.schema.ts
|	├── action.ts
|	├── env.ts
|	├── utils.ts
Step 6: Rendering
To ensure that all functions work properly, let's try running the function. Open the folder app/(root)/(home)/page.tsx, and then paste the following code:
//app/(root)/(home)/page.tsx
import { getResources } from "@/sanity/action";

export default async function Home() {
  const resources = await getResources({
    query: "",
    tags: "",
    page: "1",
  });

  console.log(resources);
  return <main></main>;
}
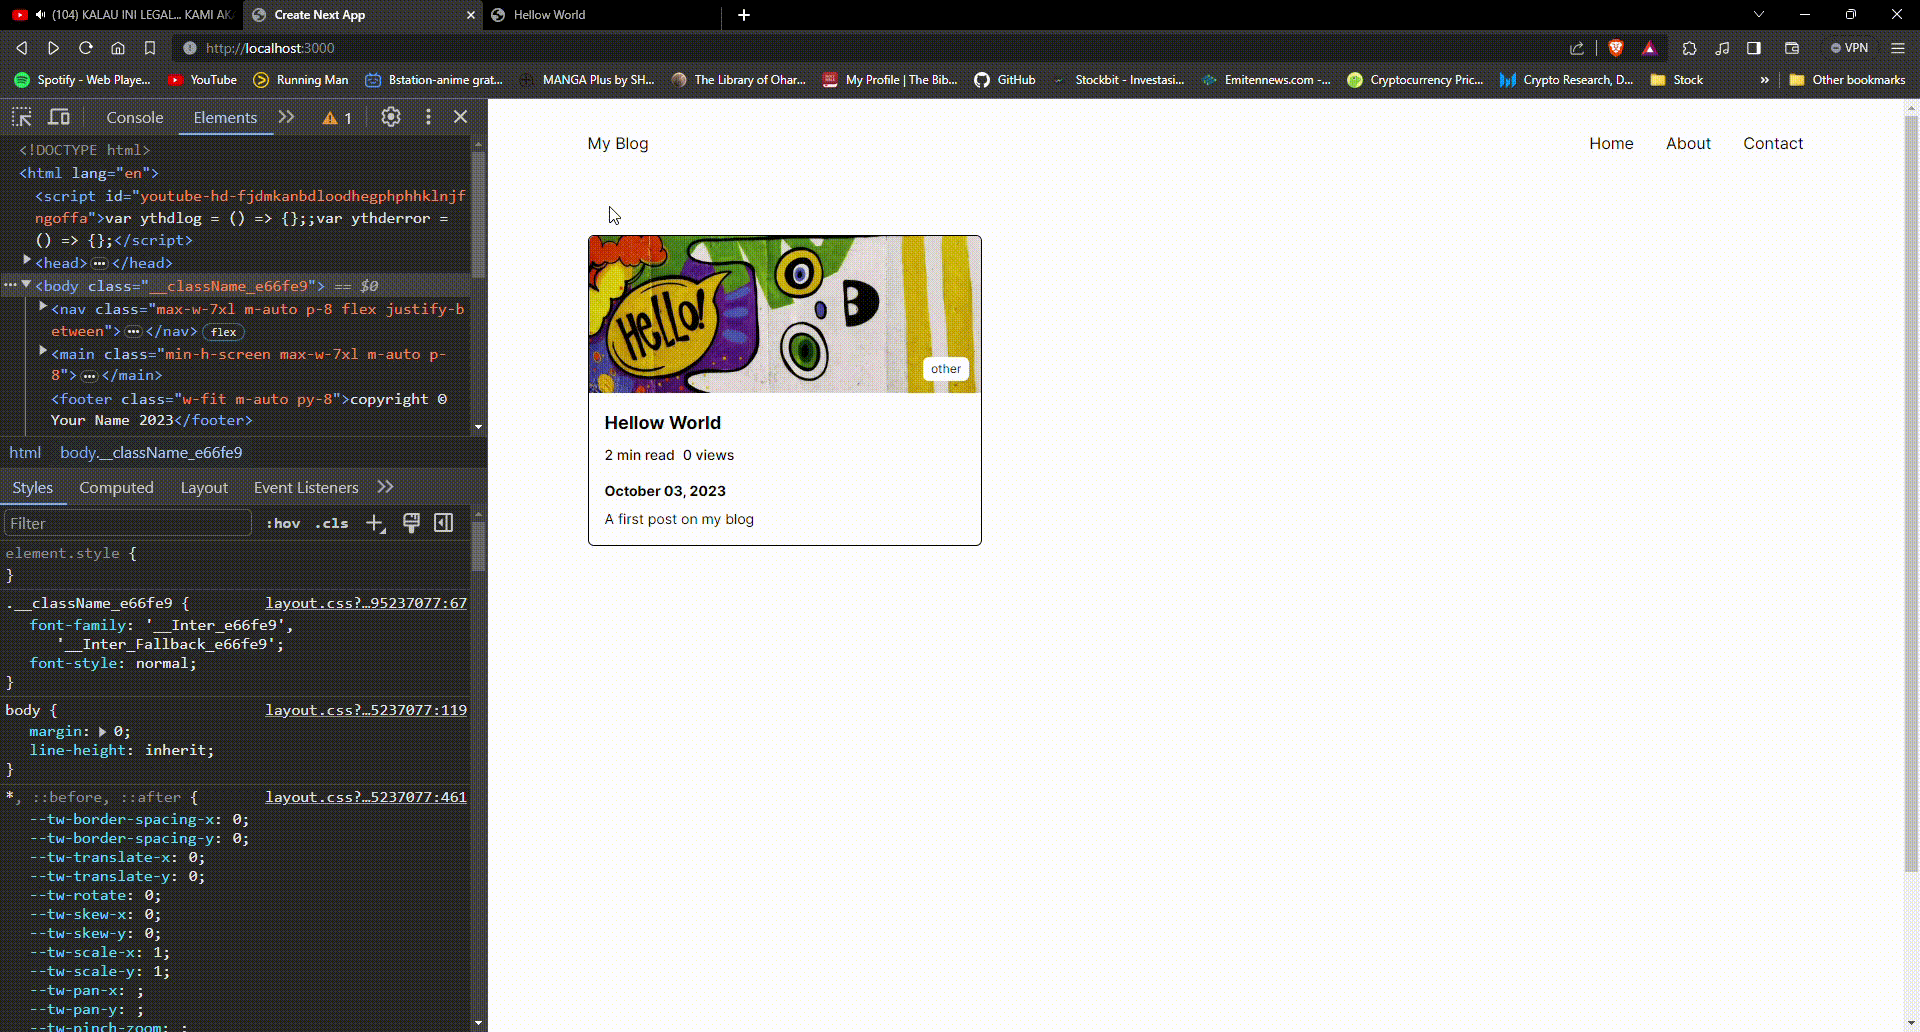
Next, open the terminal. Because the function we created runs on the server, the console output will appear on the server, not in the browser. If you have followed the steps correctly, the result from the resource should look like this:
[
  {
    content: [ [Object] ],
    title: 'Hellow World',
    readingTime: '2 min read',
    image: ''
    tags: [ 'other' ],
    overview: 'A first post on my blog',
    _id: 'fc72dc5d-9eb1-3cfb82f49b0f',
    slug: { current: 'hellow-world' },
    views: 0,
    releaseDate: '2023-10-03'
  }
]
Now, we are ready to render this data into our blog card component. You can use a simple blog card component that I've created or get creative with your own, you can get the code for the BlogCard component below:
"use client";
import { ResourceItem } from "@/app/(root)/(home)/page";
import { incrementViews } from "@/sanity/action";
import { format } from "date-fns";
import Image from "next/image";
import Link from "next/link";
import { useState } from "react";

export default function BlogCard({ resource }: { resource: ResourceItem }) {
  const [localViews, setLocalViews] = useState(resource.views);

  const handleCardClick = async () => {
    try {
      const updateViews = await incrementViews(resource._id);

      setLocalViews(updateViews);
    } catch (error) {
      console.error(error);
    }
  };

  return (
    <li className='h-full w-full rounded-md border border-solid border-black'>
      <Link href={resource.slug.current} onClick={handleCardClick}>
        <div className='relative'>
          <Image
            src={resource.image}
            alt='Photo taken from Unsplash'
            width={1200}
            height={480}
            className='h-auto w-auto rounded-t-md'
            priority={true}
          />

          <div className='absolute bottom-3 right-3 flex gap-1'>
            {resource.tags.map((tag) => (
              <span
                key={tag}
                className='rounded-md bg-white px-2 py-1 text-xs '
              >
                {tag}
              </span>
            ))}
          </div>
        </div>
        <div className='p-4'>
          <h1 className='font-bold md:text-lg'>{resource.title}</h1>

          <div className='mt-2 flex gap-2 text-sm font-medium'>
            {resource.readingTime}
            <span>{localViews.toLocaleString() ?? "0"} views</span>
          </div>

          <p className='mb-2 mt-4 text-sm font-bold'>
            {format(new Date(resource.releaseDate), "MMMM dd, yyyy")}
          </p>

          <p className='text-sm'>{resource.overview}</p>
        </div>
      </Link>
    </li>
  );
}
If you encounter an error on the hostname cdn.sanity.io is not configured under the image in your next.config.js.
You can fix your next.config.js configuration as follows:
//next.config.js
const nextConfig = {
  images: {
    domains: ["cdn.sanity.io"],
  },
};

module.exports = nextConfig;
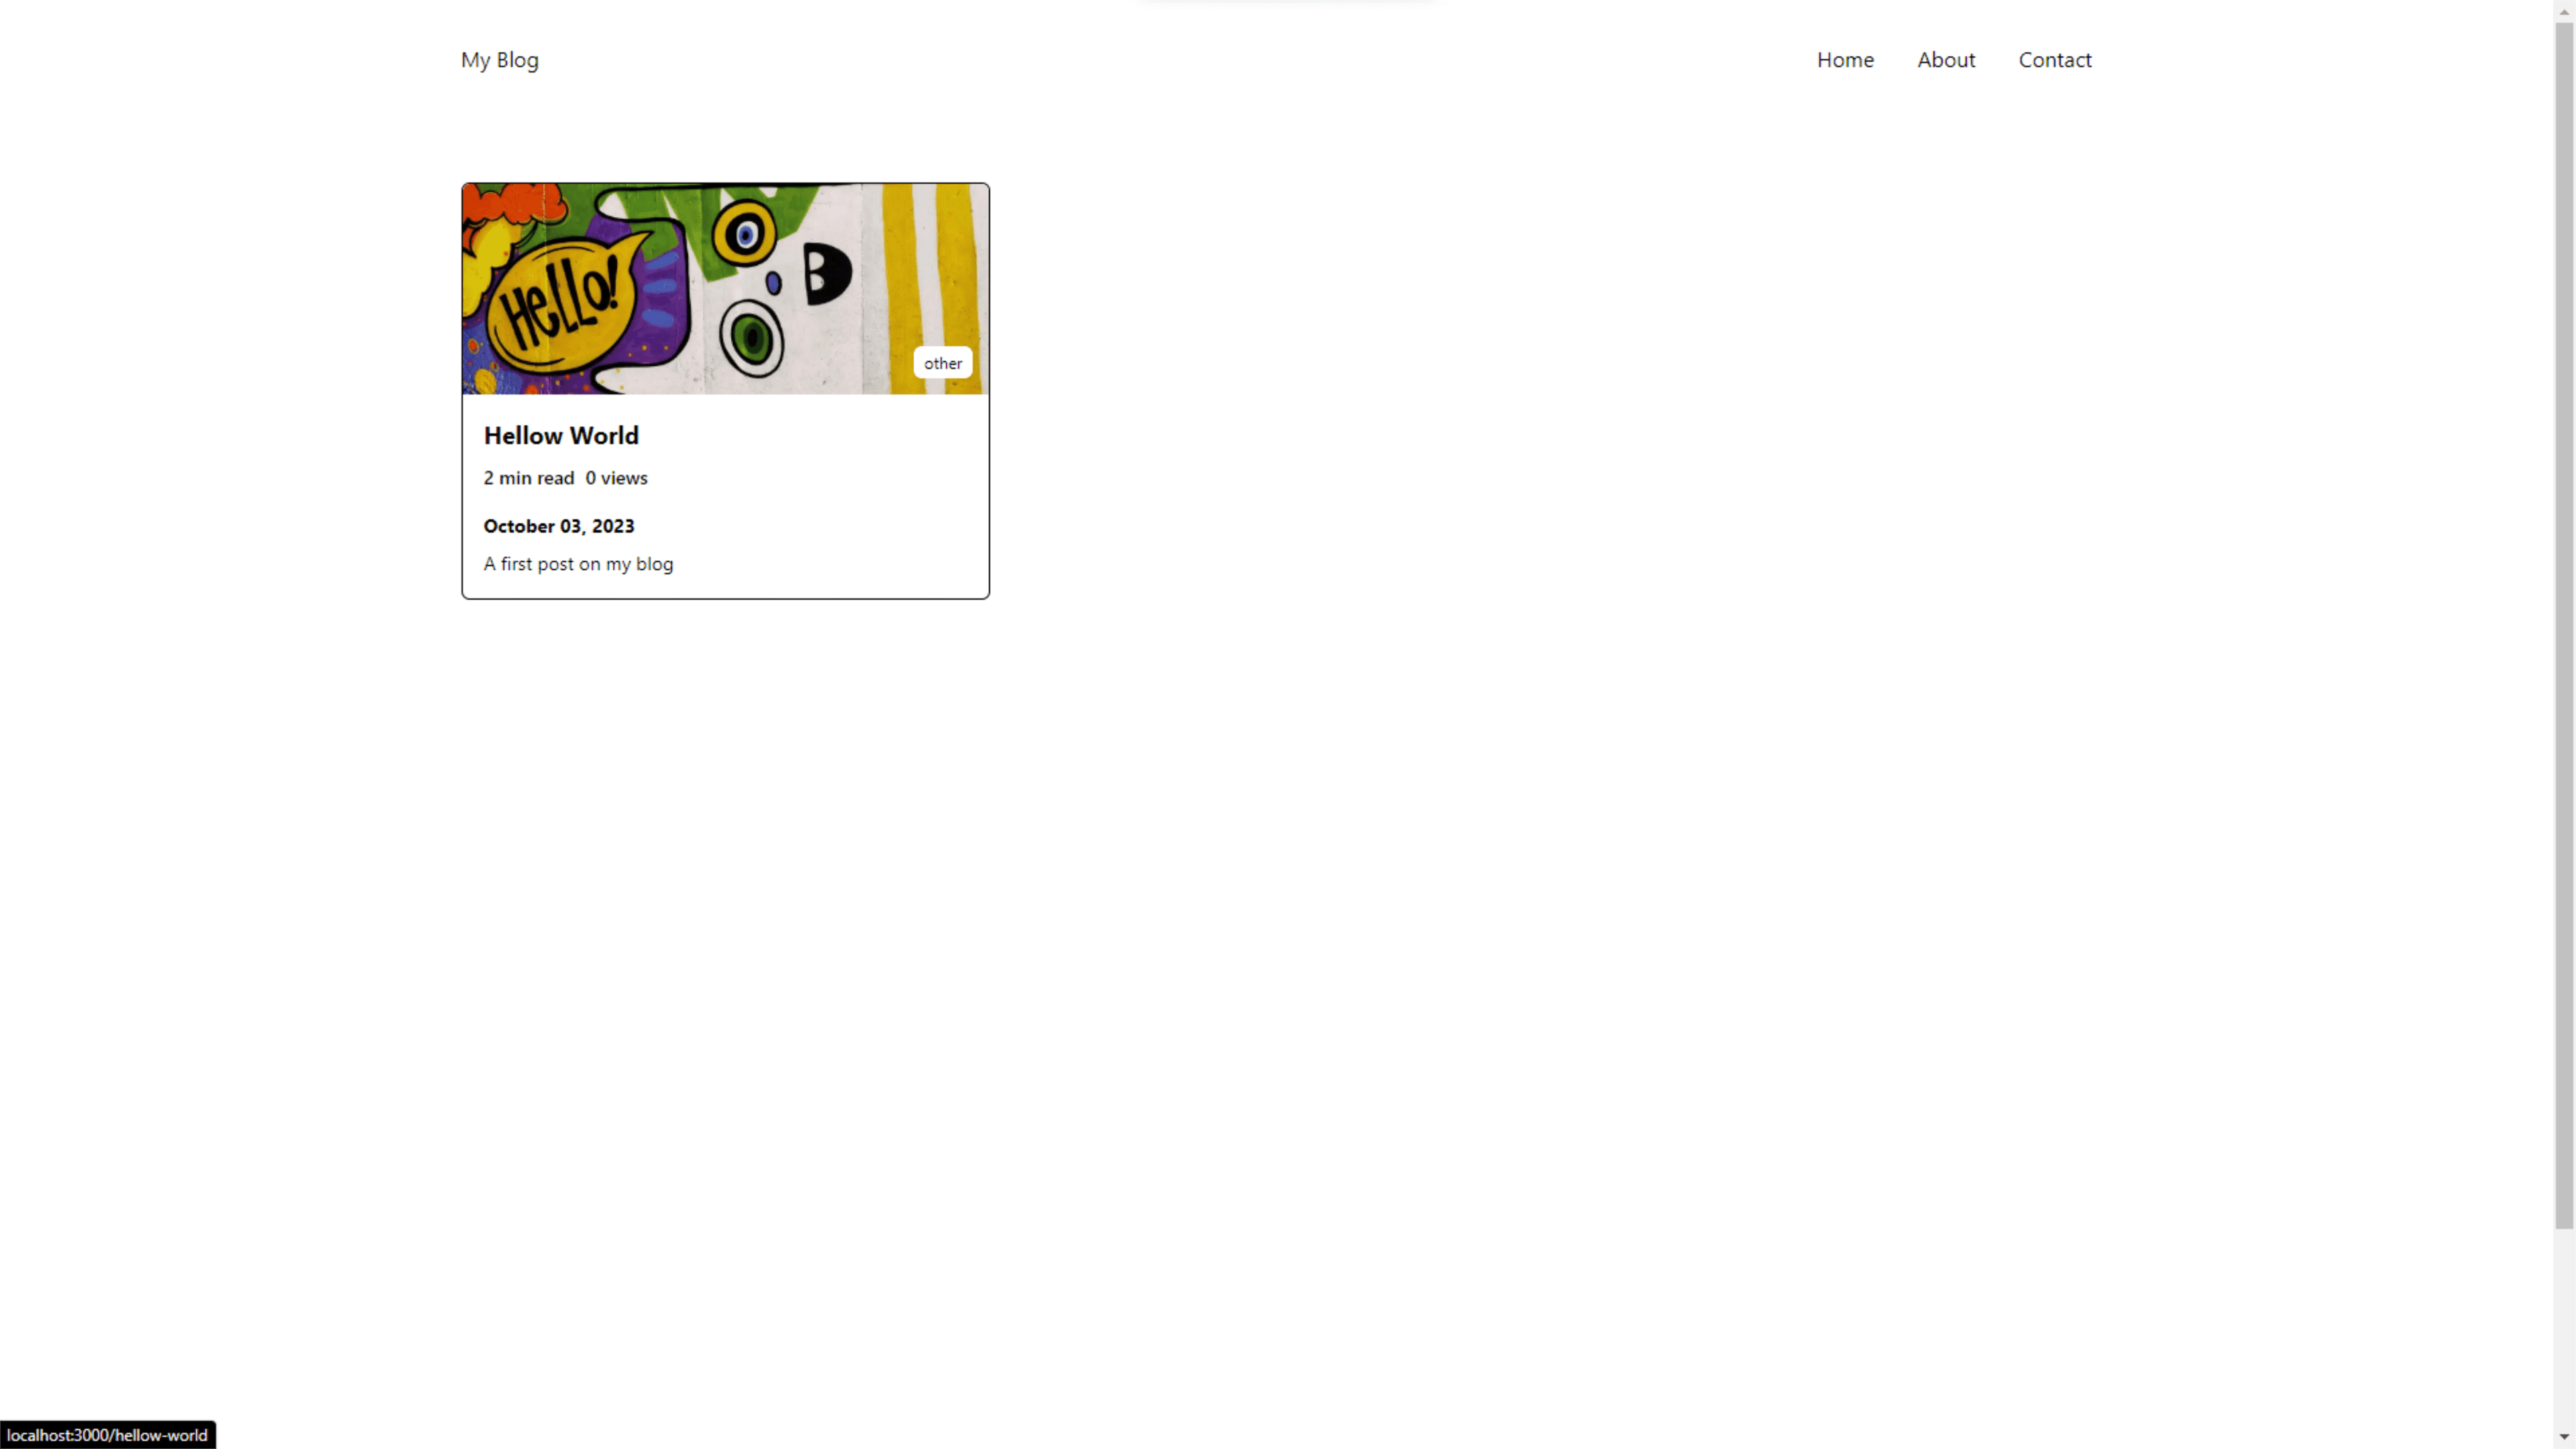
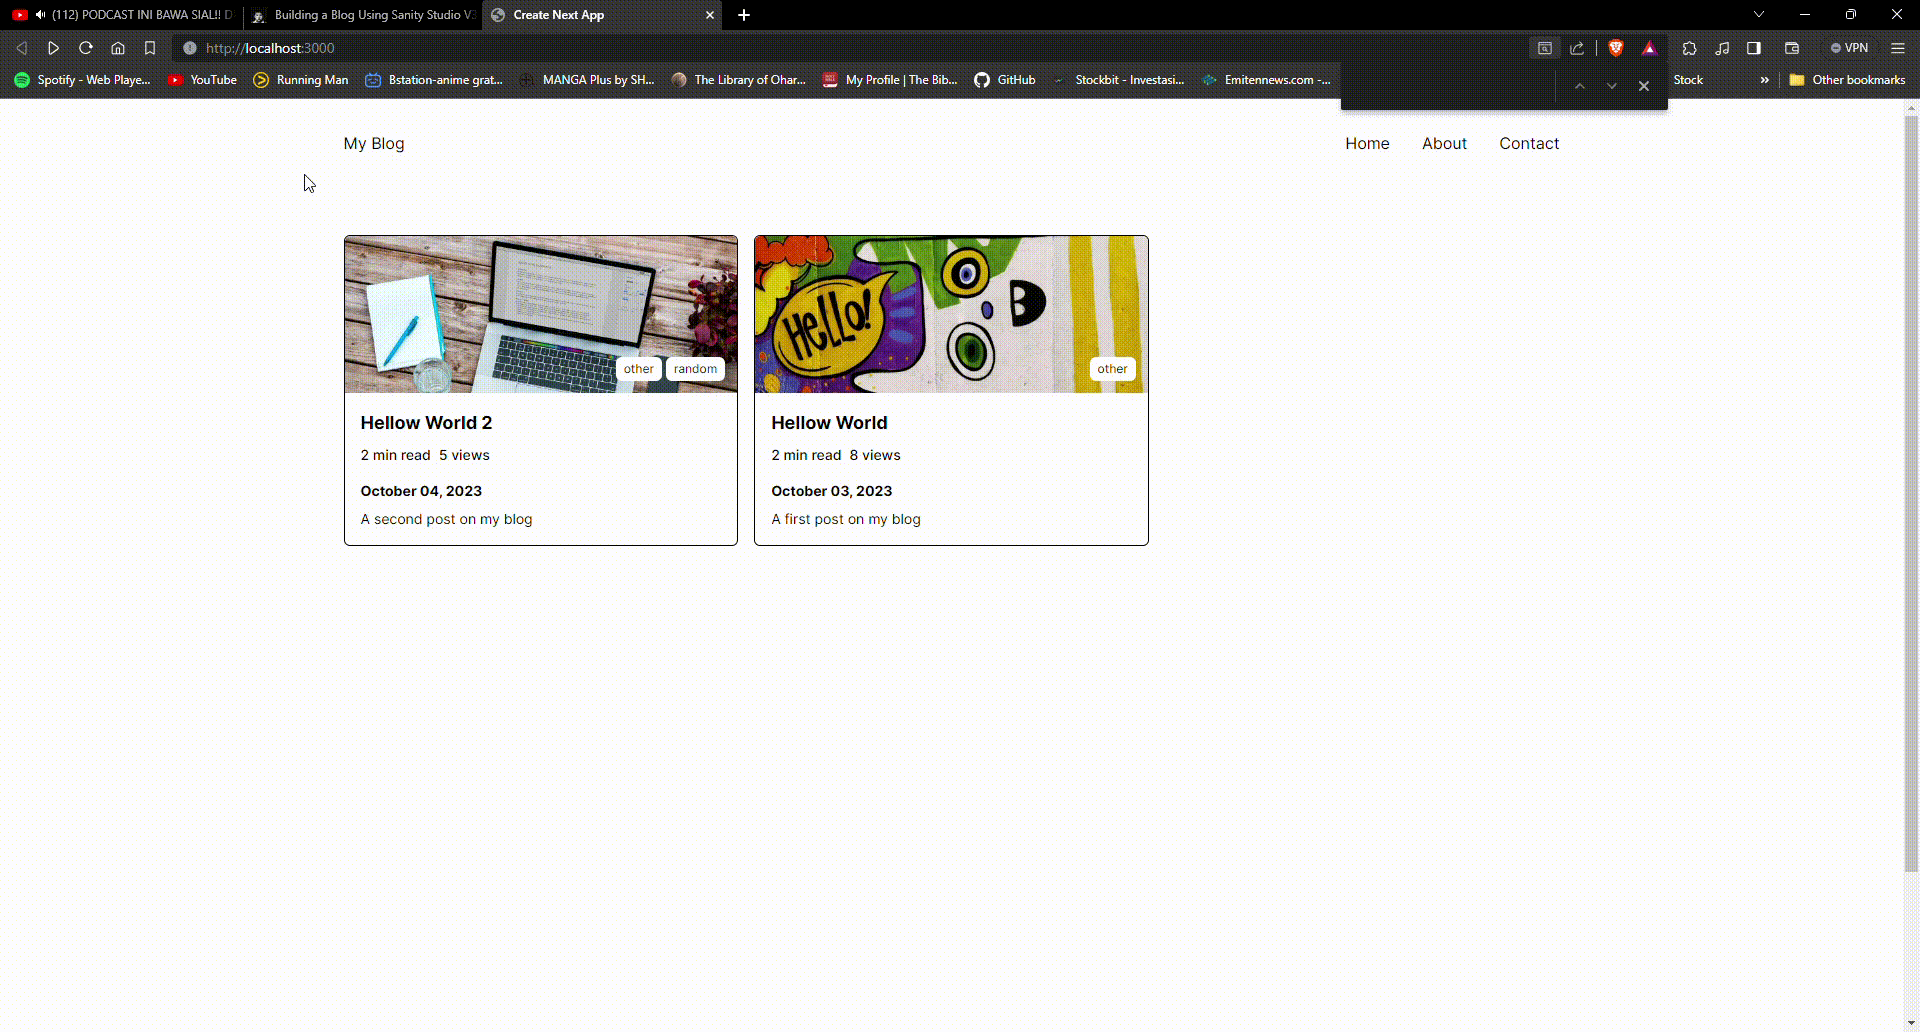
If you choose to use the BlogCard component I provided, the end result will be something like this:
Crank Up Blog Views
Now it's time to use the writeClient to update the data views every time our blog card is clicked. To do this, we need an authorization token, which you can obtain by following these steps:
- Visit https://www.sanity.io/ and log in to your account.
- In the Projects tab, select our project named blogs-resource
- Go to the API section within that project, then in the Tokens section, click the Add API Token button
- Give the token a name (you can choose any name you prefer, for example, token)
- Change the token's permissions to editor and click the Save button
- Copy the token and paste it into our .env file
For a clearer understanding, you can refer to the steps outlined in the GIF below:
Setup Env
Open the sanity/env.ts file and add the following code anywhere you like. I recommend adding it below the projectId section to align with this tutorial:
export const token=assertValue
(process.env.
 NEXT_PUBLIC_SANITY_TOKEN,
  "Missing environment variable:
  NEXT_PUBLIC_SANITY_TOKEN"
);
Setup Handler
Uncomment the writeClient in sanity/lib/client.ts and don't forget to import the token from the newly created env.ts. Open sanity/action.ts and add the following code snippet, and make sure to import writeClient:
You can get the full code of the incrementViews function below:
export async function incrementViews(blogId: string): Promise<number> {
  try {
    const currentViewsQuery = groq`*[_type == "resource" && _id == $blogId][0].views`;
    const currentViews = await readClient.fetch<number>(currentViewsQuery, {
      blogId,
    });

    const updatedViews = currentViews + 1;

    const patchOperation = {
      set: {
        views: updatedViews,
      },
    };

    await writeClient.transaction().patch(blogId, patchOperation).commit();

    return updatedViews;
  } catch (error) {
    console.error(error);
    throw error;
  }
}
Close the sanity folder. Now, let's switch to the components folder and open BlogCard.tsx. We will create a handler where every time a blog card is clicked, this handler will be called and increment the number of views for our blog, If you have used the BlogCard component above, then there is already a pre-built handler.
Add onClick to the Link tag so that it looks like this: <Link href={resource.slug.current} onClick={handleCardClick}>
Also, add "useClient" at the very top of BlogCard.tsx because we are using useState on the client side, not the server side. Then, update the props for our view to use localViews instead of resource.views: <span>{localViews.toLocaleString() ?? "0"} views</span>
Once everything is set up, let me first explain the simple logic behind the above handler. We will create a state variable to store the initial views count. When the handleCardClick is triggered by the onClick event listener, it will call the incrementViews function with the argument being the ID of the clicked blog card. Then, it will update the value of localViews with the incremented views count:
Step 6: Create Detail Blog Page
The final step of this tutorial is to create a page for the blog detail using Next.js dynamic routes. Here's how to do it:
- Create a new folder within the (home) directory and name it [...slug].
- Inside the [...slug] folder, create a file named page.tsx
By following these steps, you will create a blog detail page using dynamic routes in your Next.js project. Then, add the following code snippet to the page.tsx file inside the [...slug] folder:
Get the full code of the BlogDetail page below:
//app/(root)/(home)/[...slug]/page.tsx

import { getResources } from "@/sanity/action";
import { format } from "date-fns";
import Image from "next/image";

const BlockContent = require("@sanity/block-content-to-react");

export default async function BlogDetail({
  params,
}: {
  params: { slug: string };
}) {
  const resource = await getResources({
    query: params.slug,
    tags: "",
    page: "1",
  });

  return (
    <main className='min-h-screen max-w-7xl m-auto p-8'>
      <Image
        src={resource[0].image}
        alt='Photo taken from Unsplash'
        width={1200}
        height={480}
        priority={true}
        className='rounded-lg'
      />
      <h1 className='mt-5 text-2xl font-bold md:text-4xl'>
        {resource[0].title}
      </h1>
      <p className='mb-5 text-sm font-bold'>
        Written on {format(new Date(resource[0].releaseDate), "MMMM dd, yyyy")}{" "}
        by Andre Avindra
      </p>
      <div className='flex gap-4 mb-8'>
        <span className='gradient__text'>{resource[0].readingTime}</span>
        {resource[0].views?.toLocaleString() ?? "0"} views
      </div>

      <BlockContent
        blocks={resource[0].content}
        projectId={process.env.NEXT_PUBLIC_SANITY_PROJECT_ID}
        dataset={process.env.NEXT_PUBLIC_SANITY_DATASET}
      />
    </main>
  );
}
In essence, the BlogDetail page will receive parameters sent from our Home page, specifically a slug. We will then use this slug to filter data in the getResource function as the query. Afterward, we can utilize the resource data for rendering. To render the resource.content, we can't directly render it as-is. Instead, we need to use a package called block-content-to-react. You can also use other packages like portable text. To install the required packages, use the following command: npm install --save @sanity/block-content-to-react.
The final result of the BlogDetail page will roughly look like this:
Conclusion
In this article, we have explored how to create a blog using Sanity Studio v3 and Next.js 13 (App Router). The combination of Sanity as a powerful Content Management System (CMS) and Next.js as a fast React framework provides us with powerful tools to build a feature-rich and responsive blog.
We started by setting up our project, configuring Sanity Studio to manage content, and designing a user-friendly interface. Next, we proceeded to connect Sanity Studio to Next.js to fetch and display content data from the CMS on our website.
With this knowledge, you now have a strong foundation for creating a personal blog or other websites using Sanity Studio v3 and Next.js 13. You can continue to expand this project by adding additional features or customizing the design to suit your needs.
Congratulations on your achievement in mastering these technologies, and may this article assist you on your journey to create an engaging and functional blog. Keep learning and advancing your skills in web development!
If you enjoyed this article, don't forget to leave a 👍and comment below. If you have any questions or topics you'd like to discuss, please leave your comment below.
See the complete code of this blog in this GitHub Repo & GitHub Gist.
